Level 4
Assign the desired vendors to the supplier evaluation (cf. Figure 16). To do this, click on the italic red text “Vendor assignment not completed”.
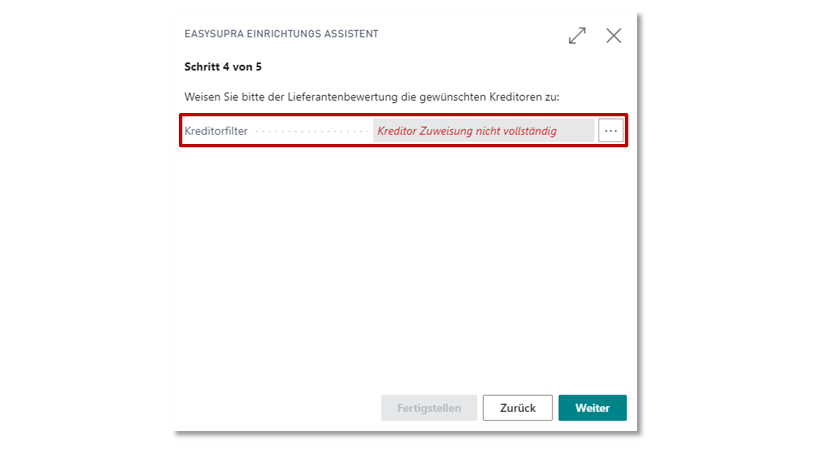
Fig. 16: Setup Wizard - Step 4 (Vendor Assignment)
An overview of the already assigned vendors opens. Here you have the possibility to assign further vendors or to remove already assigned vendors by using the buttons “Add Vendor” and “Delete Vendor” (cf. Figure 17).
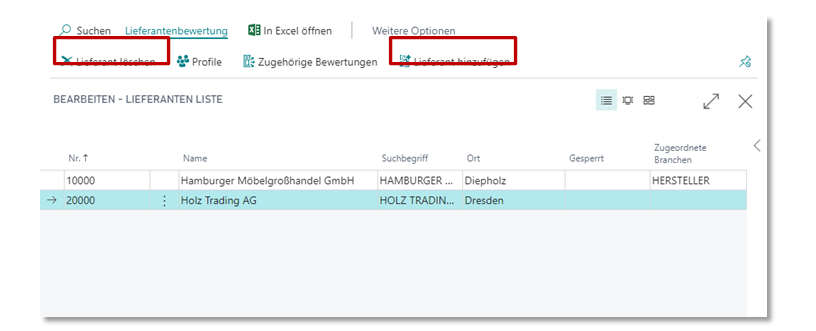
Figure 17: List of assigned vendors.
If you want to add vendors to your current rating, click “Vendor
Add”. A list of all available vendors will open. Mark here the
corresponding vendors and add them to your list by clicking “Confirm”. If
If you want to remove suppliers from the opened list, mark the suppliers to be deleted in the list and then click the
in the list and then click on the “Delete vendor” button.
Alternatively, you can filter the list in the usual way, then select the vendors you want to delete and click the
and then press the “Delete Vendor” button.
If you now close the list of vendors, you will return to the setup wizard (see Figure 16). The previously red italicized text “Vendor assignment not completed” is now replaced by the green text “Add/delete vendor assignment”.
