Level 5
Confirm with “Next” in the wizard to proceed to the last setup step.
Set up the rating classification in the window (see Figure 18). Click
the text “Classification not completed” in red italics.
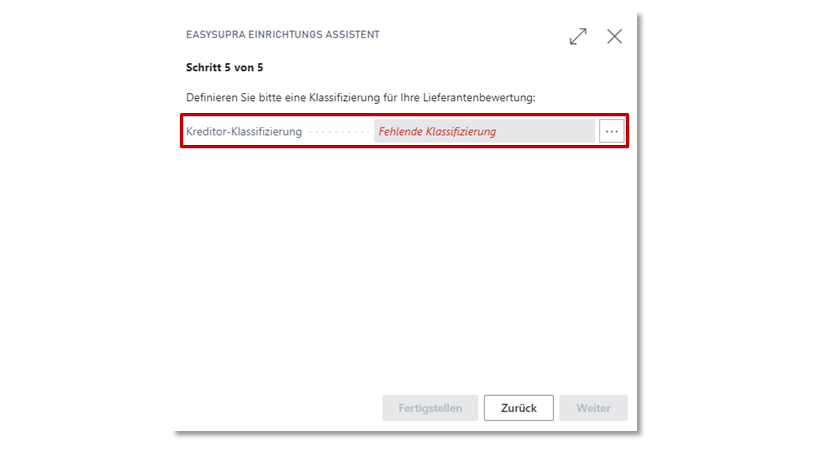
Figure 18: Setup Wizard - Level 5.
(Classification definition)
Press the “New” button to create a new classification. The following is an example of how to select the “TEST VALUED” valuation code. The creditors
will be marked with the classification codes “A”, “B”, “C” or “D”, according to the achieved rating.
“D” according to the number of points achieved. If, for example, a vendor achieves a score of at least 89.01, it is marked with the classification “A” (see Figure 19).
(see Figure 19).
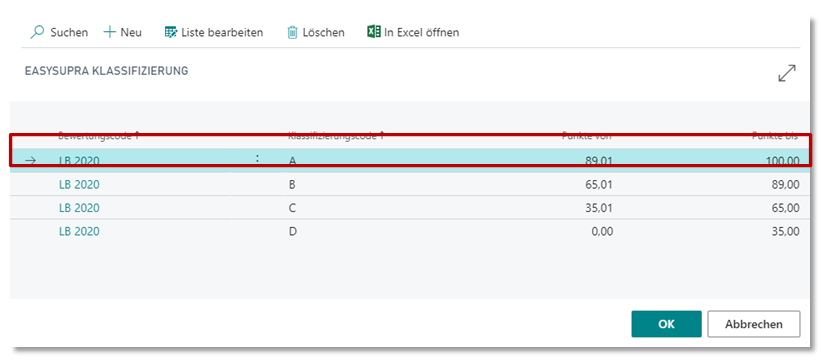
Figure 19: Definition of classification.
Please note: The point ranges of the individual ratings must be set up exactly to 2 decimal places. Confirm with “OK.” In addition, the classification codes can be defined individually (e.g. Very good, Good, Sufficient, …). To complete the setup, click the “Finish” button in the wizard.
