Installation
OnPrem
You will receive the objects for the Connector 365 Base & Mail Attachment Plus App from us by mail. In order to be able to use the App, they must first be published and then installed.
Publishing of the Connector 365 Base & Mail Attachment Plus App
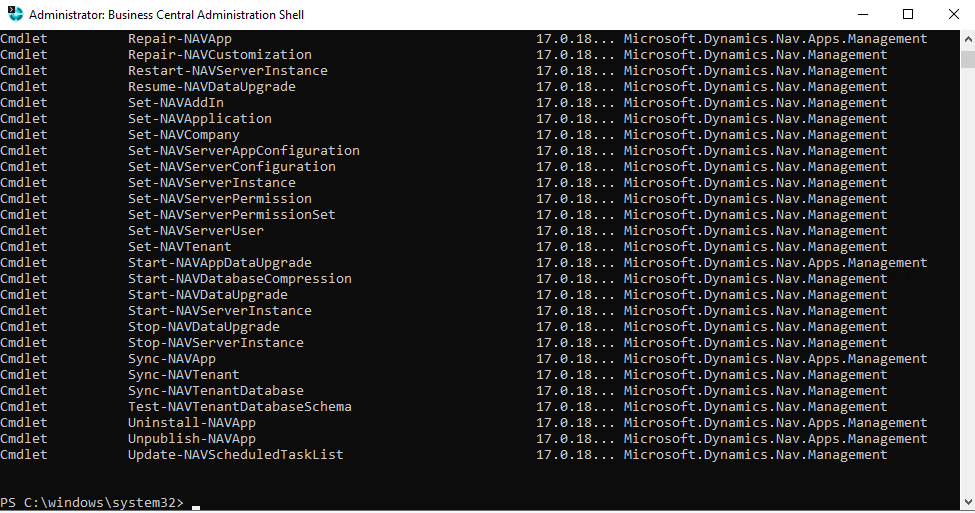
the publishing of the Connector Base & Mail Attachment Plus App is done via the Business Central Administration Shell. First transfer the files we sent to you to the server where your Business Central instance is running.

Now start the Business Central Administration Shell to start the publishing process. Using the Administration Shell, first navigate to the location for the file using the cd command.
Example:
cd C:\Apps
Now that you are in the appropriate folder, you can use the following command to first publish the base app
Example:
Publish-NAVApp -ServerInstance IhreBusinessCentralInstanz -Path ".\BasisApp.app"
Afterwards you should also perform the process for the actual Connector 365 Mail Attachment Plus app
Example:
Publish-NAVApp -ServerInstance IhreBusinessCentralInstanz -Path ".\MailAttachmentPlus.app"
Both apps should now be published in your system.
Installing the Connector 365 Base & Mail Attachment Plus App
In the extension management of your environment, you will now see the apps as published, but they are not yet installed.

Installing via the client
Open your Business Central environment, open the search function and look for Extension Management.
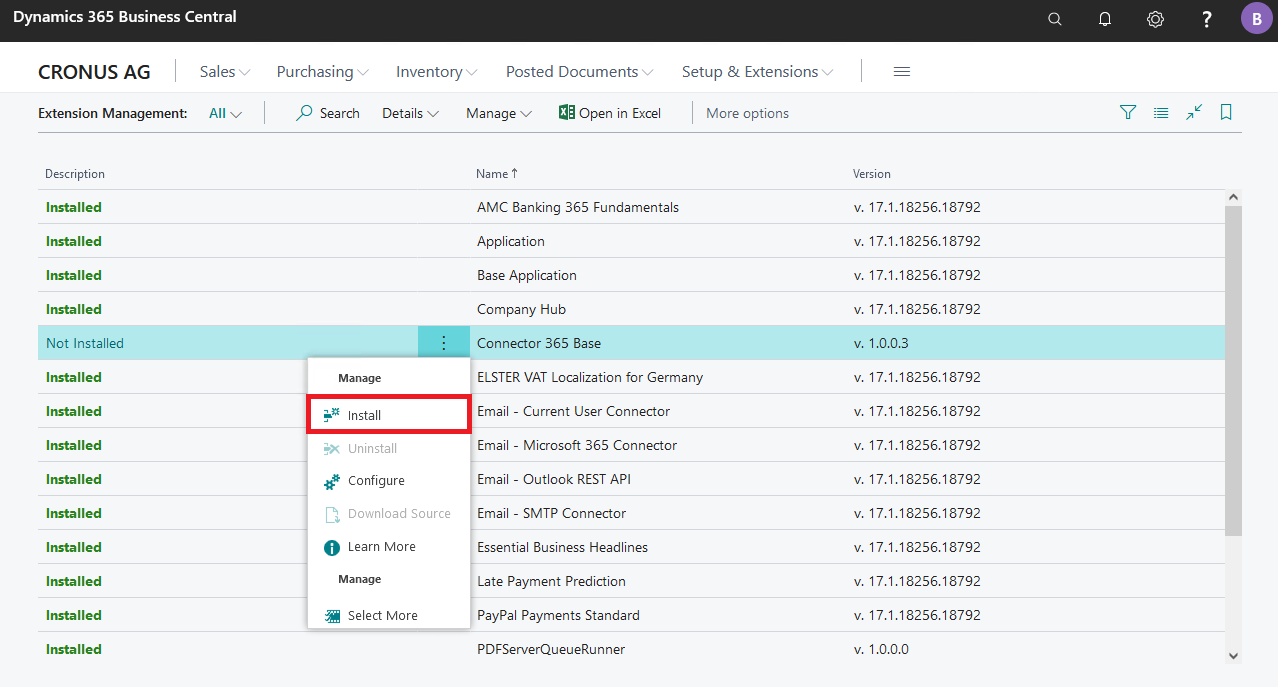
There you should find the two apps with the status not installed. By clicking on the 3 dots of the respective app, you can now install it in your environment via the item Install.
Installing via the administration shell
In case you want to install via the Administration Shell (this has the advantage that you can install on several tenants at once), you have to use the Install-NAVApp command. When doing so, you should specify the Tenant ID. In the following examples, we install the apps in two tenants.
To install the Connector 365 Base app, use the following command:
Example:
Install-NAVApp -ServerInstance IhreBusinessCentralInstanz -Name "Connector 365 Base" -Tenant Tenant1, Tenant2
The Connector 365 Mail Attachment Plus app follows:
Example:
Install-NAVApp -ServerInstance IhreBusinessCentralInstanz -Name "Connector 365 Mail Attachment Plus" -Tenant Tenant1, Tenant2
You can now start with the setup.