Setup
Setting up the document layouts
In order to be able to use the Connector 365 Easy Batch App correctly, you must first set up the customers who want to receive documents in batch mode.
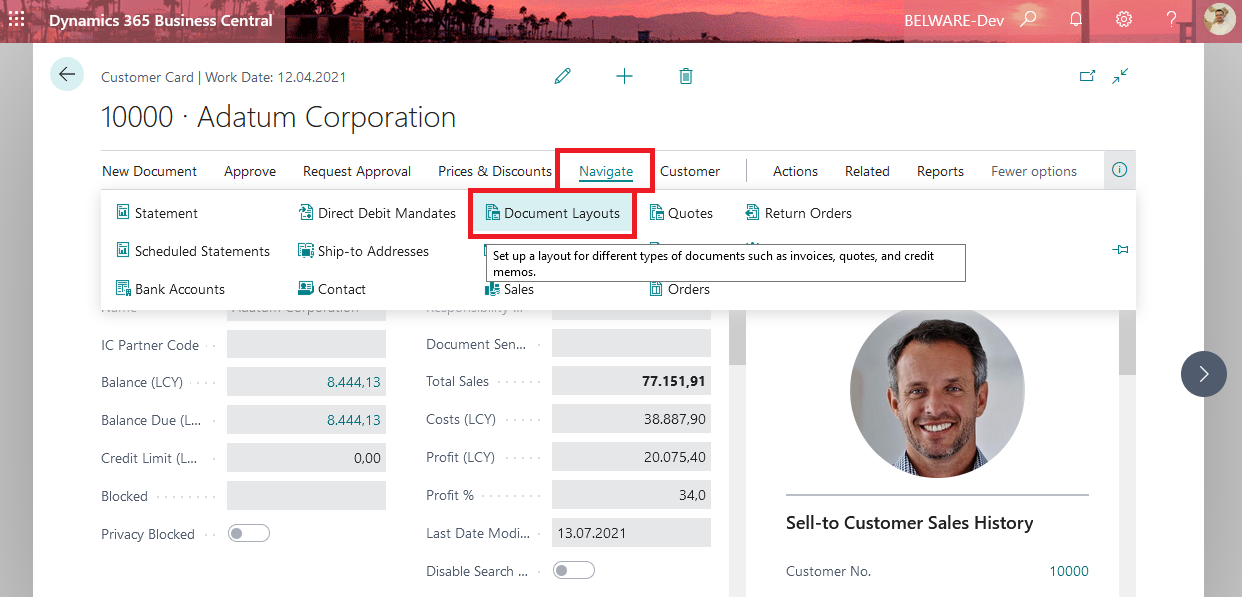
Open the desired customer and navigate to the document layouts
Navigate -> Document layouts

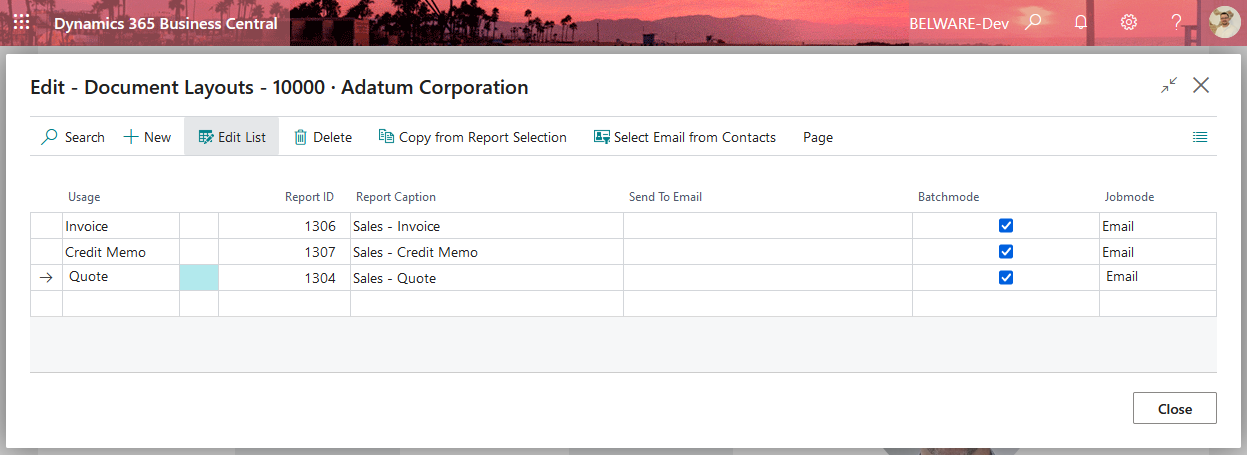
Once there, you will discover two new controls: a checkbox to control the batch mode and a dropdown menu for the job mode.
The check in the Batch Mode field causes the job mode selected here to be used during batch processing for the respective usage.
The selection in the Job Mode field controls the way the documents are put out.

You can set up all uses and use them in batch mode. It is basically possible to set several job modes per document. These will then be processed one after the other.
Job mode
The Job mode specifies how the batch is handled. By default, there are three options available there - Email, Print and Blank.
E-Mail
In the E-mail mode, the documents of the batch function are sent by e-mail.
Print
In the Print mode, the documents of the customer are printed when using the batch function. The default printer selection is used.
Empty
An empty field is a special case. It takes effect if the check mark in the field Batch mode is not set. If the batch function is started in this constellation, the document sending profile set for the respective customer is used for processing the entry.
In case you are using either the Connector 365 E-POST App, the Connector 365 XRechnung App or both apps, the following options are available:
XRechnung
In XRechnung mode, the customer’s documents are sent as XRechnung when using the batch function. This mode requires a previous setup of the Connector 365 XRechnung app. For more information, please refer to the setup of the Connector 365 XRechnung App
E-POST
In E-POST mode, the customer’s documents are sent as a letter when using the batch function. This mode requires a previous setup of the Connector 365 E-POST app. For more information, please refer to the setup of the Connector 365 E-POST App
Example
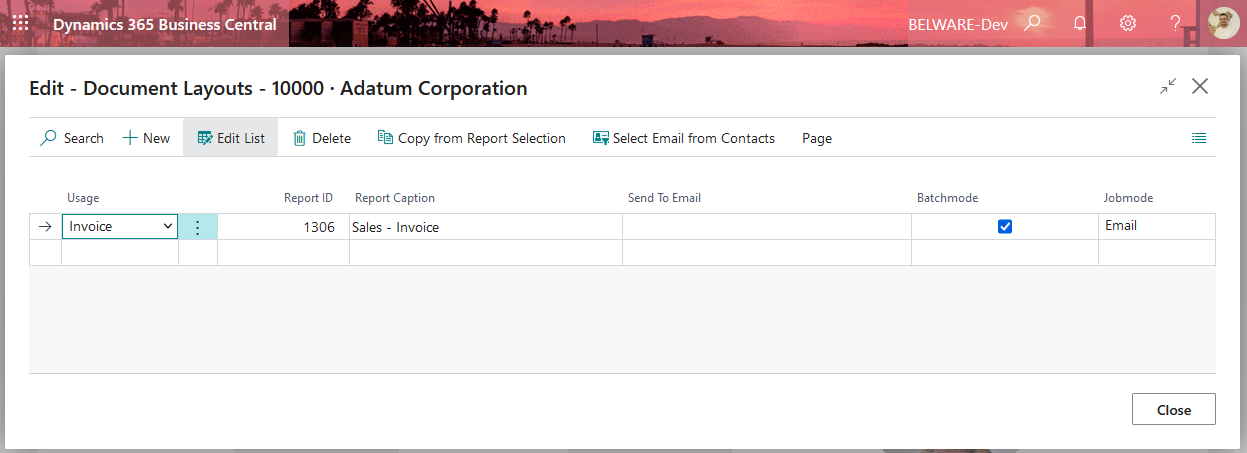
Now, if you want to use batch sending for invoices in mail for the selected customer, you need to do the setup as follows.
