Setup
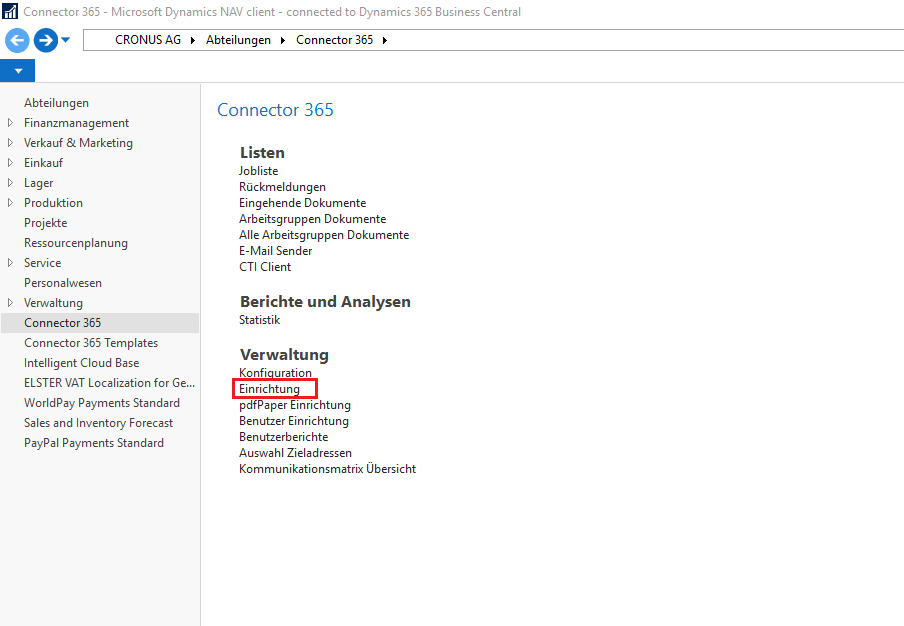
The setup for XRechnung is done in the Connector-Setup and in the Communication Matrix. To get into Setup, go to Connector 365 -> Setup as shown in the following image.
The settings that affect XRechnung can be found in the Per Client section under the PEPPOL/XRechnung Setup tab.
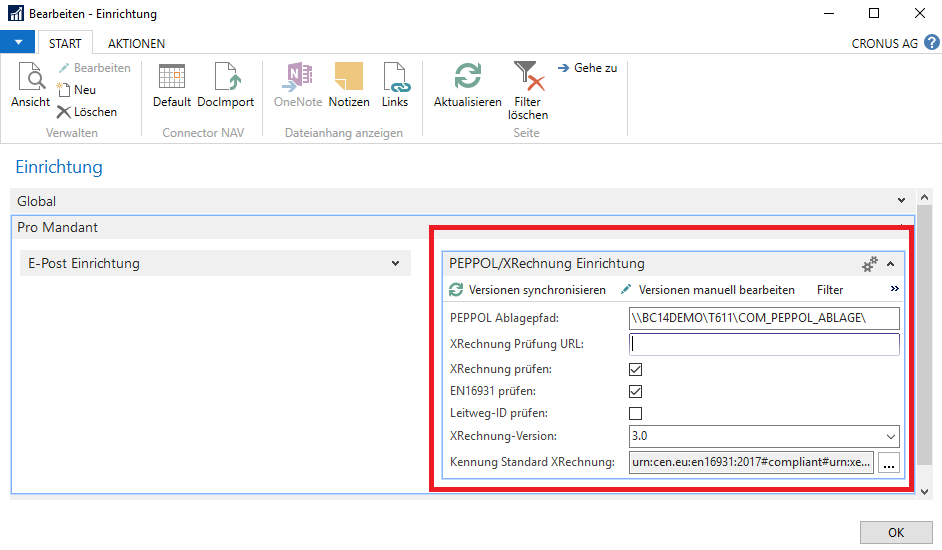
Here you can find the following fields/checkboxes:
| PEPPOL storage path (optional) | Here you can define a path where PEPPOL/XRechnung related files (XML files, test reports) should be stored. If this path is not set, the path com_out stored in the setup will be used for storage. |
| XRechnung validation URL (Optional) | URL for validation server. If not set up by default: belware-validator.westeurope.cloudapp.azure.com:5090 |
| Validate XRechnung [Yes/No] | Specifies whether XRechnung files should be validated by XRechnung Validation URL. |
As already mentioned in the preparation, you have the possibility to use our validation server. It checks if the generated XRechnung is compliant with the formal requirements. If you want to use your own server, you can enter your server URL in the XRechnung validation URL field. As soon as this field is filled, the validation process will be triggered by the entered server. In order for the validation to take place, an additional checkmark must be placed in the XRechnung check checkbox below. If you want to do without validation, you can leave the checkbox empty. (Not recommended)
The further setup for XRechnung takes place in the communication matrix.
The easiest way to get into the communication matrix is to open one of the Connector 365 Templates for Sales, e.g. Sales Invoices or Sales Credit Notes.
Then highlight an invoice for a customer for whom you want to send invoices in XRechnung format and click Communication Matrix. at the top of the bar.
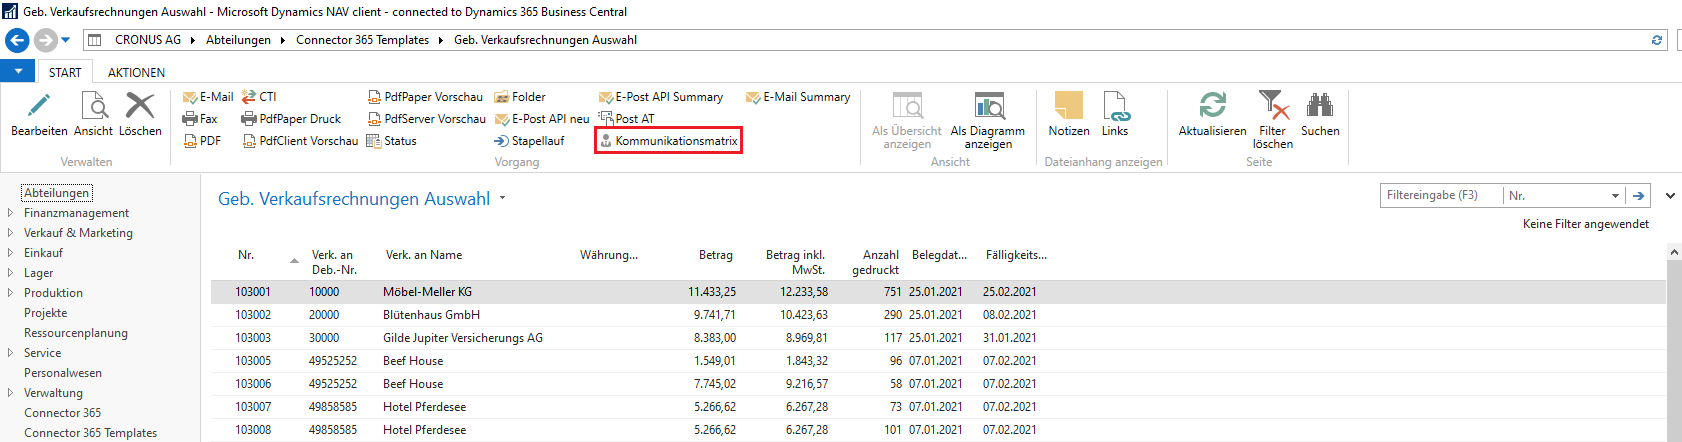
This will open the communication matrix, pre-filtered to the customer stored in the highlighted invoice.
Alternatively, you can open the communication matrix via the Connector 365 menu.
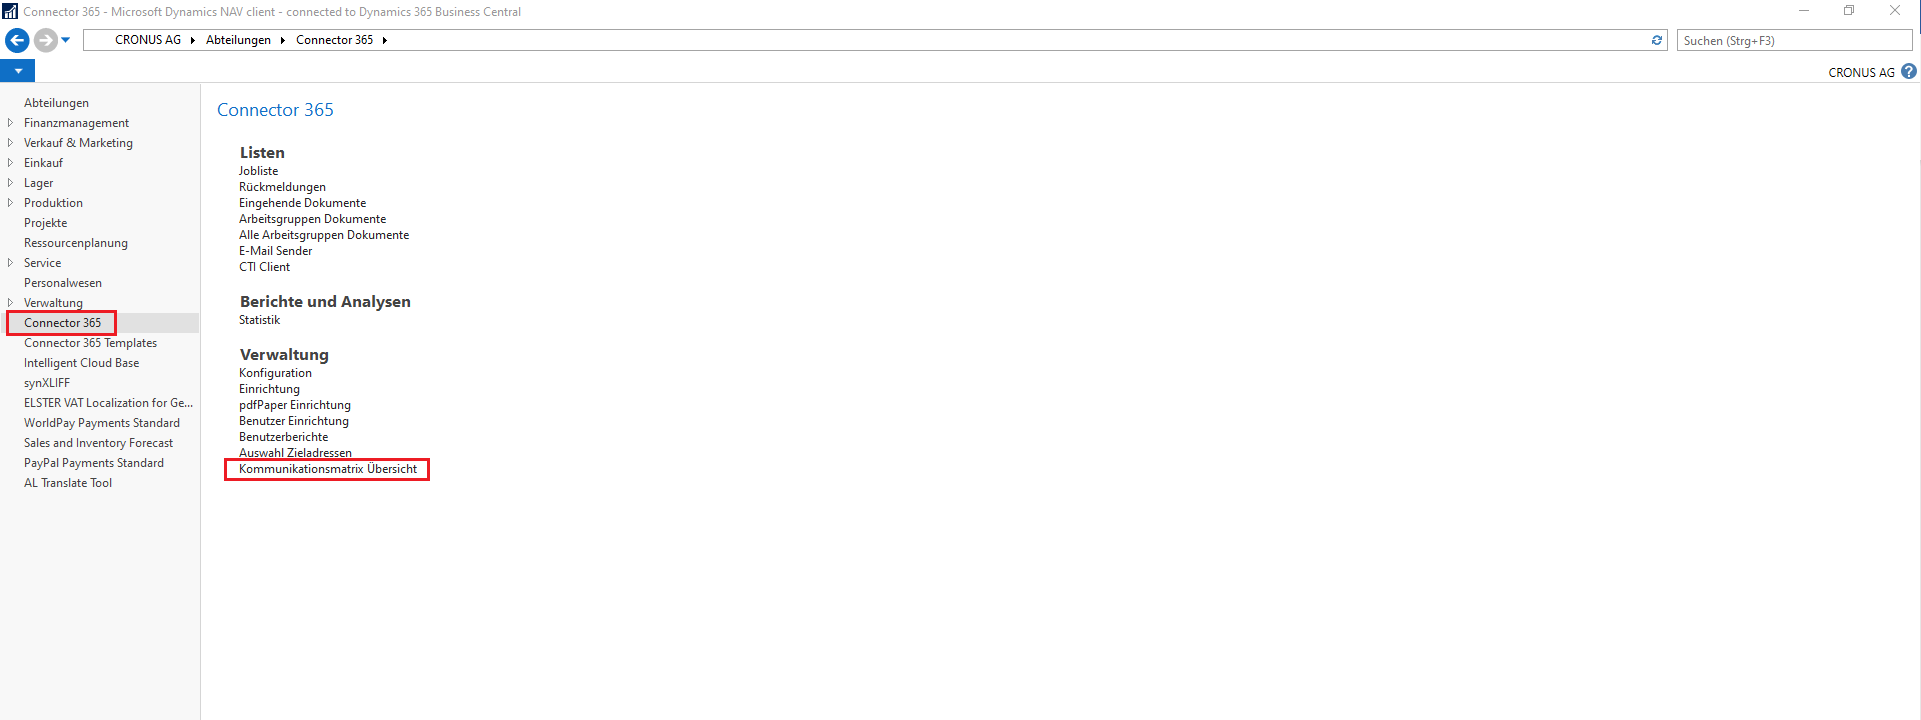
However, you will then find an unfiltered view that gives you an overview of all entries in the matrix.
For more information on the Communication Matrix, please refer to the associated documentation.
The XRechnung module extends the Communication Matrix with the following columns:
XRechnung, Route ID and XRechnung PDF as attachment.

In the following example we want to create an invoice for Gilde Jupiter Versicherungs AG in XRechnung format. To do this, we enter the number 1306 (Standard Sales - Invoice) in the Report ID field. For the Job Mode we select PDF. In addition, we place a check mark in the XRechnung field and enter a valid routing ID in the Routing ID field. In this test example, we entered a test routing ID 123-456-76.
The route ID is used to uniquely identify the invoice recipient (see the section: route ID for more details).
Using the Dropdown list XRechnung PDF as attachment you have the option to determine whether the invoice should be ‘attached’ as a PDF file in addition to the XRechnung. The PDF file can either be handled by mail as an additional attachment (Mail module), or embedded in the XML file. For more information on embedded attachments, see the Accompanying Documents section.
Since the invoice is a sales invoice, we select Sales Invoice from the Dropdown List in the PEPPOL Usage field.
From the Dropdown list of the PEPPOL Version field we select PEPPOL BIS3. Now we can create an XRechnung from the invoice.
