Setup
Prerequisite is that the software of your TAPI-enabled PBX is installed and already running.
For the installation you will get a zip folder from us, which contains all necessary files of the TapiMaster. You can download this folder in the customer portal under Downloads/Other Downloads. Depending on what kind of phone system you have (Multi/Single Line) there is a different procedure for the setup.
Single Line (Client)
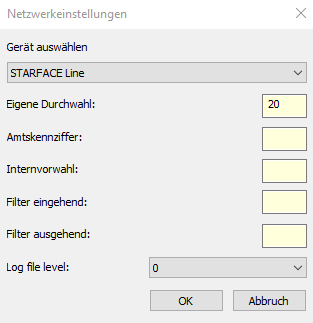
Open the zip folder, now start the FCTICLNT application. Now you should find in the lower right corner of the Windows bar the program CTI Client. Right click on it and then click Network Connection. In the opening window you have now above the possibility to select the line, which should be used. It is also important to enter your own extension number here.
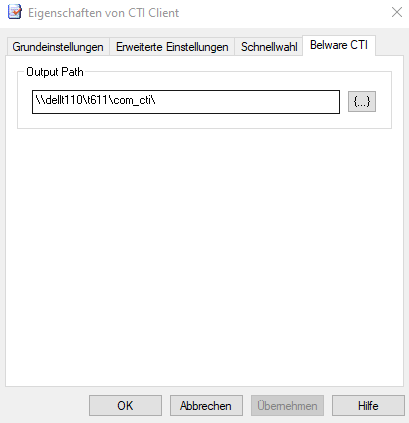
Once you have made the settings, confirm the window with OK. Afterwards click again with right on the program CTI Client, but this time select Settings. Here it is important to store the storage path for the CTI files under the tab BELWARE CTI. This step must be repeated for each computer or user that wants to use the CTI module.
Multi Line (Server)
Even if you use a Multi Line Tapi, you will find everything you need in the zip folder. First open the setup and install the software, this must be done on the telephony server and server/user on which NAV or CN is installed should be given access. Afterwards you will find a shortcut to the TapiMaster control console on your desktop, start it.
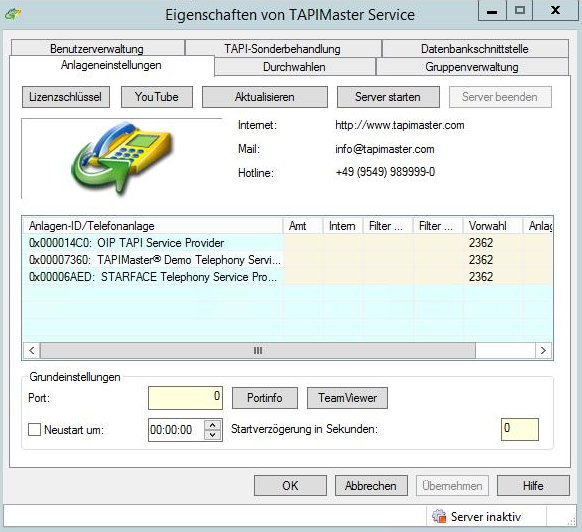
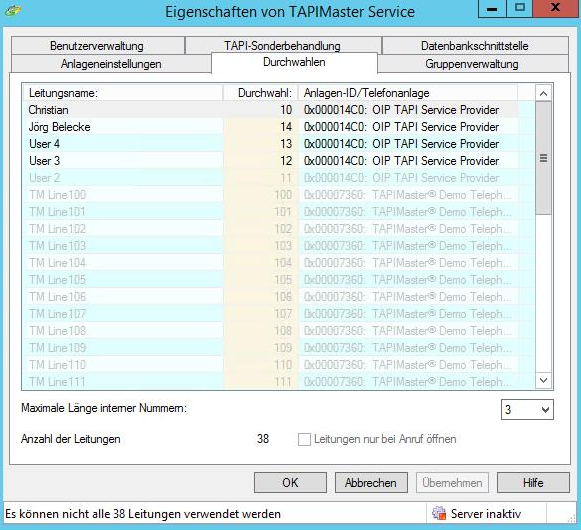
Before you make any further settings, you must first load the telephone system via “Refresh” in the system settings. First, set your area code via the system settings. Then open the tab for extensions and set them there as well. You should also remove the extensions on the lines which will not use the CTI module.
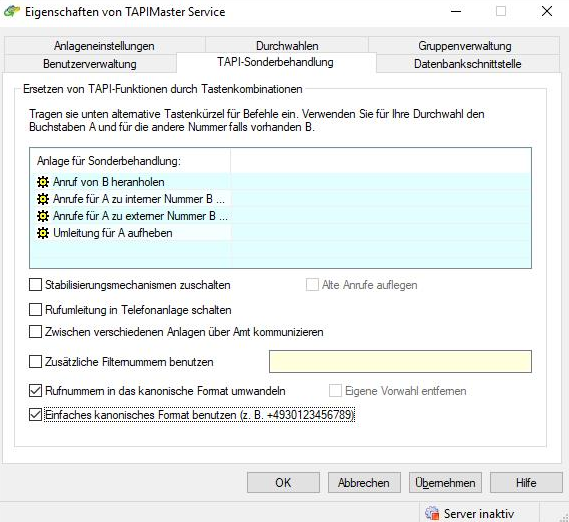
Then you have to activate via the TAPI special handling that numbers use the simple canonical format.
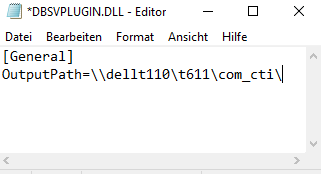
Finally you have to define in the DBVSPLUGIN.DLL, which can be found in the installation directory, in which path the call data should be stored, this should lead to the path for your CTI module.
Note: *The .DLL is only created when the control console is opened for the first time.
User setup
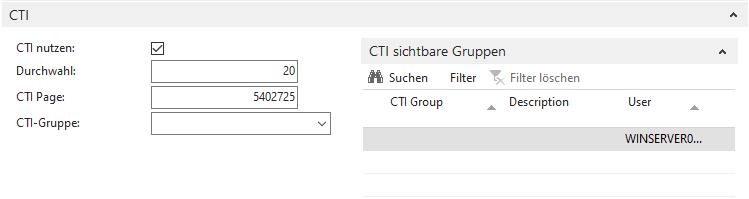
In NAV you will now find the item CTI in the role center in the upper bar. On the CTI Client page you can now create users and display their telephony in NAV. Here it is again important to enter the correct extension number.
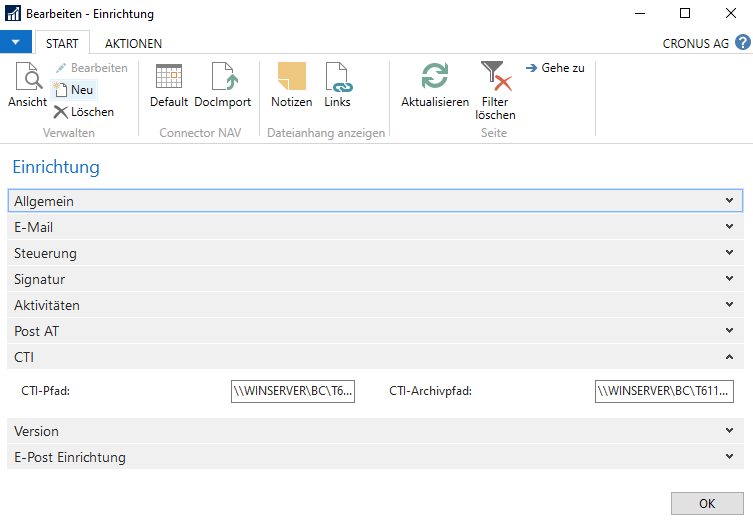
In the setup of the Connector NAV you also have to enter the path in the tab “CTI”. This path must be identical with the path stored in the client. Afterwards a path for the archive must be specified.
In the user setup it is possible to manage per user who can see who is on the phone, for example you can create groups for the different departments in your company and assign them to the different users. The CTI function is activated by checking the box “Use CTI”. If the check mark is set, the CTI client opens automatically when NAV is started. Here you can also define which card is opened during a call. This is either the default contact card or the one of the Connector NAV